Adjusting photo's
I have accessed Pixir Express to adjust my photo's and had a play with this program. I seems very versatile but it's automatic adjustment (Auto Fix) is a hoot - takes all the colour out of things, I found.
Anyway just using several things in Adjustments - crop, contrast, colour and sharpen - I changed my images and came up with several versions. I have dropped their size for this blog so they will load and you don't get the full impact then of the changes but beggars cannot be choosers and this program is easier to use and more versatile than Paint which is my go to one for my cards. I also use Picasso but it is more difficult to operate and I tend to only use it of I need a special effect.


Anyway just using several things in Adjustments - crop, contrast, colour and sharpen - I changed my images and came up with several versions. I have dropped their size for this blog so they will load and you don't get the full impact then of the changes but beggars cannot be choosers and this program is easier to use and more versatile than Paint which is my go to one for my cards. I also use Picasso but it is more difficult to operate and I tend to only use it of I need a special effect.
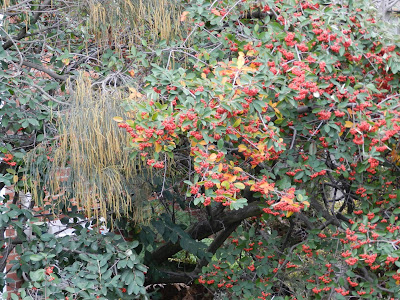
These first ones were taken from the balcony directly across to trees in the neighbour's yard.
Taken Monday 29th at about 2.00 pm in natural light - no sunlight
Number 1

unaltered
This one is altered

the cluster of berries are more clearly seen and the individual leaves show up more as do the branches. The shadows are darker and the leaves of the she oak more distinct.
Number 2 original

This one did not seem to change that much except the shadows are darker

Number 3 original
taken with camera pointed to the sky - the she oak is in flower and dropping pollen everywhere at the moment


Much better contrast and colour stronger giving a clearer definition to each stalk and bauble
I really like the way the middle distance is in focus and the close and far focus is not.
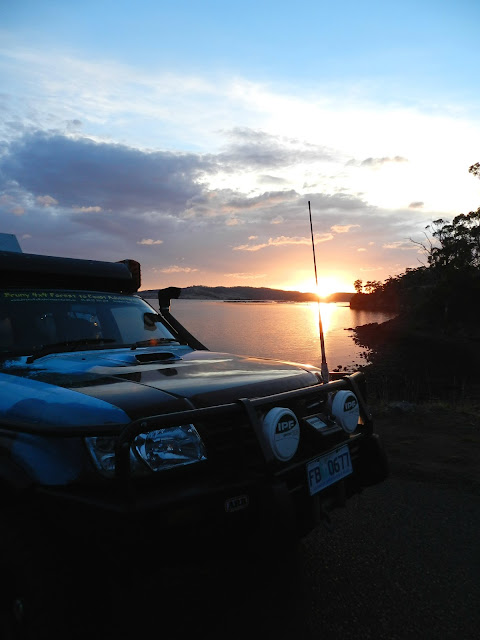
Number 4 - this time I was more on the level and the blue/grey behind is the bay not sky

This time the foreground is in focus and the segments show on each 'leaf'.
The original looks a little watery or washed-out

The contrast and the sharpening and hue + saturation + brightness have given more definition
Number 5 - looking from balcony down into a man fern

Again sharpening bought out each frond and the lightness and saturation could have drowned out the detail in the centre and had to be adjusted to allow for this. Natural light was falling down into this fern from overhead and bouncing back off some fronds.

Number 6
Same fern - zoom not as far out
You can see another pot on the left front and the concrete on the right front
The fern is in the garden not a pot

Probably made the hue a bit too green but the sharpness and contrast show so much more detail

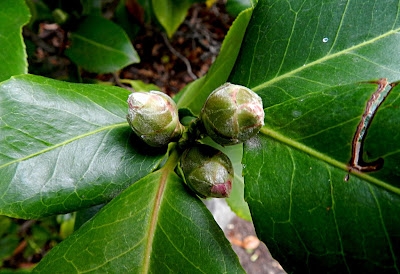
Number 7 - the first camellia buds
This tree is so old (about 45 years) and is in need of lots of food
Still producing amazing flowers each year
Camera was set on Macro with the zoom employed

Just sharpened it and lessened the brightness to reduce the reflecting light off the leaves
The darker green in the leaves shows the vein off more and although there is light bounce it is not hiding detail.
I tried to crop out the insect damage but it would have spoiled the photo so left it in.

Number 8 - succulant
Facing straight into the natural light
fence behind plant
Macro with the zoom
I think that must be a piece of leaf litter under the leaves (brown)
love the way the little zigzag edge is so clearly delineated

I lessened the brightness and changed the hue to get this one. I like the drama of it
The shadowns become darker again for more contrast

Number 9 - these should be dead by now but are just finishing up
A pop of pink in the winter garden which is all leaves and green at the moment
Caught the watering system in the background peg and yellow tape
Macro and zoom used

Altered with hue, saturation, brightness, contrast and sharpness
In deepening the pink strips I had to increase the depth of colour elsewhere too and so the green is greener and the shadows behind deeper.


Comments
Post a Comment